
This will be the last of my "field trips" as part of the course of study I have been on for the month of JULY in Italy: "History of Italian Architecture 19th - 20th Century Design", with our Professor Dr Giulia CERANI SEBREGONDI. I can't think of a better way to end a glorious month in Italy, well unless I can fit a trip in to see Lake Como!!!
Central Train Station Milan Central Station (in Italian, Stazione Centrale di Milano or Milano Centrale) is one of the main European railway stations. It was officially inaugurated in 1931 to replace the old (1864) central station, which was a transit station and could not handle the new traffic caused by the opening of the Sempione tunnel (1906).

Due to the Italian economic crisis during World War I, construction proceeded very slowly, and the project, rather simple at the beginning, kept changing and became more and more complex and majestic. This happened especially when Benito Mussolini became Prime Minister, and wanted the station to represent the power of the fascist regime.
It has no definite architectural style, but is a blend of many different styles, especially Liberty and Art Deco, but not limited to those. It has been characterized by Frank Lloyd Wright as one of the most beautiful stations in the world, together with New York's Grand Central Terminal.
On Sept 25, 2006 officials announced a €100 million project, already in progress, to refurbish the station. Of the total cost, €20 million has been allocated to restore "certain areas of high artistic value" while the remaining €80 million will be used for more general improvements to the station to make it more functional with the current railway services. The project includes moving the ticket office and installing new elevators and escalators for increased accessibility.
Pirelli Skyscraper In 1950 Alberto Pirelli, the president of the Pirelli Company, required that a skyscraper be built in the original area where the first factory was constructed in the 19th century. In front of the Stazione Centrale is one of the world's highest reinforced concrete skyscrapers in the world and one of the most elegant for the shape of its tapered top.
(127 meters), designed in 1955-60 by Gio Ponti, with a concrete structure by Pier Luigi Nervi.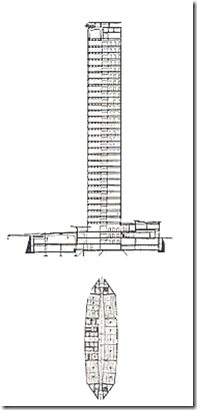

Characterized by a bold, structural skeleton, smooth refined curtain wall façades, and tapered sides like the bow of a ship, it was among the first skyscrapers to abandon the customary block form. Until recently, it was the tallest building in Italy. The architectural Hasan-Uddin Khan praised it as 'one of the most elegant tall buildings in the world' and as one of the 'few tall European buildings [that made] statements that added to the vocabulary of the skyscraper'.
Some architectural critics believe that the Pirelli building was the inspiration for the design of the Pan Am Building (now MetLife Building) in New York.
Ca'Brutta is a residential building in Milan . The first work of the famous architect
Giovanni Muzio, a symbol of Milan of the Twenties to Forties


Site Plan
The interest manifested by the architect for modernism and its close link with the metaphysical painters, consists of two bodies, broken by a private street that increases the internal and interlaccia overlooking the massive building. The facade is divided into horizontal bands of which the lowest consists of courses travertine, the second is characterized by gray plaster same "French" and the third, above, is covered with white marble, pink and black. There is a wide use of classical elements, whose rigidity and symmetry, however, is dissolved in the provision of windows onto Via Turati and other elements typically asymmetrical. Also noteworthy is the technical accuracy and attention to detail constructive, to be typical of Muzio throughout his career.
Interesting Note: Ca 'Brutta translates to English as "Ugly House"


Maria Bostenaru photo
Palazzo Montecatini
Commissioned to Gio Ponti between 1935 and 1938 the building soon became a symbol of rationalist Milan architecture between the two wars. In the shape of an H with a private opening onto Via Moscova on one floor, it is ideal for offices with its internal layout, furnishings and external aspect working together in perfect harmony.


Externally, the green marble walls and the standardized iron and aluminum locks announce the expressive clarity and attention to detail that can also be seen on the inside. The complex actually offers avant garde solutions (mobile floors with individual work posts) as well as technological ones (controlled heating and inflatable posts) which Ponti took care of paying great attention to detail.
PAC (Contemporary Art Pavilion)
Contrary to the impression one might get from its smooth, aesthetic surfaces, Milan's contemporary art pavilion, the PAC, has had a troubled history and was bombed to smithereens by the Mafia in 1993, at a time in history when the country was heavily committed in its fight against this organisation; the cost of this fight was a completely unexpected and violent attack on the symbols of culture and art in Italy.

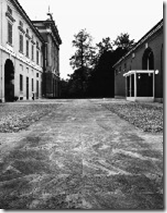
The museum was initially erected in 1947, the design by the architect Ignazio Gardella , as a symbolically peaceful and creative gesture in the immediate aftermath of the Second World War, replacing the ruins of the opulent Villa Belgioioso, which was left a smoking shell. Its purpose was to serve as a repository for contemporary arts and it was subdivided into three levels: the ground floor, devoted to sculpture, the first floor to painting and the top floor to "everything else": drawings, prints and material objects of all kinds.
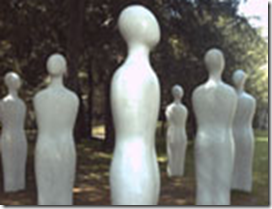
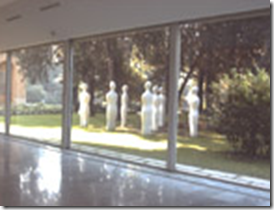
It was closed down in the 1970s, and reopened in 1979 with a slightly rethought, more modern purpose: rather than passively hosting collections of art, it now aimed to display exhibitions and works of art that made active use of the structural qualities of the building. In short, the museum itself was to become a work of art. This guiding idea persists today, in that modern works often interact closely with the structure and surfaces of the museum.
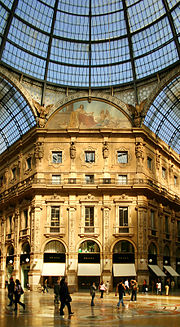
Galleria Vittorio Emanuele II is a covered double arcade formed of two glass-vaulted arcades at right angles intersecting in an octagon; it is prominently sited on the northern side of the Piazza del Duomo in Milan, and connects to the Piazza della Scala. Named after Vittorio EmanueleII, the first king of united Italy, it was originally designed in 1861 and built by Giuseppe Mengoni between 1865 and 1877.


The street is covered over by an arching glass and cast iron roof, a popular design for nineteenth-century arcades, such as the Burlington Arcade, London, which was the prototype for larger glazed shopping arcades, beginning with the Saint-Hubert Gallery in Brussels (opened 1847) and the Passazh in St Petersburg, (opened 1848) and including the Galleria Umberto in Naples (opened 1890).
The central octagonal space is topped with a glass dome. The Milanese Galleria was larger in scale than its predecessors and was an important step in the evolution of the modern glazed and enclosed shopping mall, of which it was the direct progenitor. It has inspired the use of the term galleria for many other shopping arcades and malls.
The Galleria connects two of Milan's most famous landmarks: The Duomo and the Teatro Alla Scala.
More than 120 years after its inauguration, the four-story arcade includes elegant shops selling most things from haute couture to books, as well as restaurants, cafés and bars. Directly connected to the Galleria Vittorio Emanuele II is Milan's ultra-luxurious Town House Galleria hotel, offering the city's most luxurious (and most expensive) rooms and facilities.
The Galleria is the site for many luxury goods' shops, like Gucci, Prada, Louis Vuitton. (I'm going to like this one!!)
Propilei piazza Duomo


Asnago and Vender's buildings - Mario Asnago, Claudio Vender Architects & Furniture Designers
More to follow.....when I return from Italy.
Torre Velasca was built in 1954 by the BBPR architectural partnership. BBPR is an acronym from the name of its founders: Gianluigi Banfi, Lodovico Belgiojoso, Enrico Peressutti, and Ernesto Nathan Rogers.
The Velasca Tower is part of the first generation of Italian modern architecture, while still being part of the Milanese context in which it was born, to which also belongs the Milan cathedral and the Sforzesco Castle.
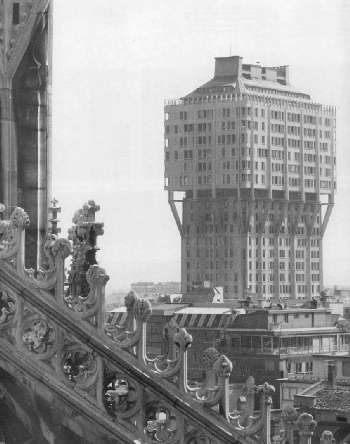

The tower, approximately 100 metres tall, has a peculiar and characteristic shape: that of a "mushroom".
It stands out in the city skyline, made of domes, buildings and other towers. Its structure reminds that of the Lombard tradition, made of medieval fortresses and towers, each having a massive profile. In such fortresses, the lower parts were always narrower, while the higher parts propped up by wooden boards or stone beams.
As a consequence, the shape of this building is the result of a modern interpretation of the typical Italian medieval castle. At the same time, BBPR in this building satisfied the functional needs of space: narrower surfaces on the ground, wider and more spacious ones on the top floors.
The town planning laws, then, imposed specific volumes (depending on the buildings' purpose); in this tower, the latter being the mixed functions of residential and commercial use.
Moretti's building in Corso Italia
A cluster of mid-rise towers containing houses and office spaces by Architect LUIGI MORETTI, this project looms over Corso Italia with a commanding street presence. The form and façade both exhibit careful detailing in the form of subtle inflections. It is located on one of the main streets in the centre of Milan. It is built on a difficult to infill site; an irregular block in a dense urban context. The design successfully combines the complex program of housing, ground floor commercial use, parking space and offices. The 5 building parts are arranged in such a way that together they define several public and private courtyards and streets.
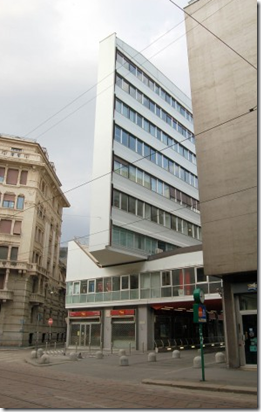
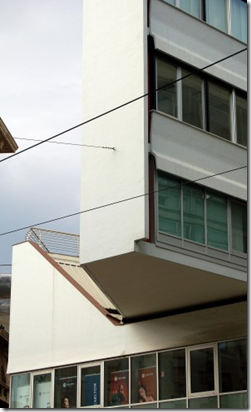
After WWII, Moretti practiced in Milan. Corso is an office, residential and shopping center constructed from 1951 to 1956 on one of the principle radial streets in the center of Milan.
The structures were wedged into a space confined by the adjoining buildings on this irregularly shaped street.There are 40 two and three bedroom flats with shops, offices and below grade parking. The number of floors vary from 3 to 14 depending on the part of the building.

Luigi Moretti was a complex and intense individual with a deep appreciation of art, national spirit and history. Throughout his career, Moretti sought guidance from his architectural forefathers in order to solve his design problems.Moretti was born in Rome, Italy in 1907, the son of a Belgian architect. He began his professional studies at the Advanced School of Architecture. But, he soon left the university to enter into building and urban planning competitions. He was awarded the projects and designed flats in Naples, Verona and Perugia.
He was professionally active from 1932 to 1973. While he began his profession in Italy. he soon expanded to the United States, Canada, Algeria, Kuwait, and elsewhere.
Castello Sforzesco a castle that now houses several of the city's museum and art gallery collections.
The original construction on the site began in the 14th century. In 1450, Francesco Sforza began reconstruction of the castle, and it was further modified by later generations.
After the unification of Italy in the 19th century, the restoration of the castle was started following its transfer from military use to the city of Milan. The restoration work was directed by Luca Beltrami. The central Filarete tower above the main city entrance was rebuilt between 1900 and 1905 as a monument to King Umberto I.
The castle was severely damaged as a result of the allied bombardment of Milan in 1943 during World War II. The post-war reconstruction of the building for museum purposes was undertaken by the BBPR architectural partnership.


The best known of the current civic museums is the Pinacoteca del Castello Sforzesco, with an art collection which includes Michelangelo's last sculpture, the Rondanini Pietà, Andrea Mantegna's Trivulzio Madonna and Leonardo da Vinci's Codex Trivulzianus manuscript.
The Castello complex also includes The Museum of Ancient Art, The Furniture Museum, The Museum of Musical Instruments and the Applied Arts Collection, The Egyptian and Prehistoric sections of the Archaeological Museum and the Achille Bertarelli Print Collection.
Triennale pavilion
Triennale Design museum
Eclecticim in piazza Cordusio and via Dante
The bustling Via Dante, a fashionable shopping street leads into Largo Cairoli, dominated by the imposing Monument to Garibaldi, sculptured by Ettore Ximenes in 1895. The bronze figures on the pedestal symbolize Revolution and Liberty. From either side of the monument extend the arms of the tree shaded boulevard, Foro Buonaparte, flanking the Sforzesco Castle in its semi-circular embrace. Behind the monument the short Via Beltrami leads right into the pleasantly landscaped Piazza Castello.


Largo Cairoli Piazza Cordusio is one of the many beautiful squares in Milan.
ciao
 First, measure your bed so you can decide how wide and tall you’ll need to make your headboard. Normally, a headboard is slightly wider than the width of the mattress, and about 8 inches of the headboard is seen above the pillows leaning against it.
 Surprisingly, a larger piece of furniture used where you used to have several small pieces will make a room look bigger. They create a less cluttered, more open space, with large blocks of color. This makes the room look less busy and more comfortable.
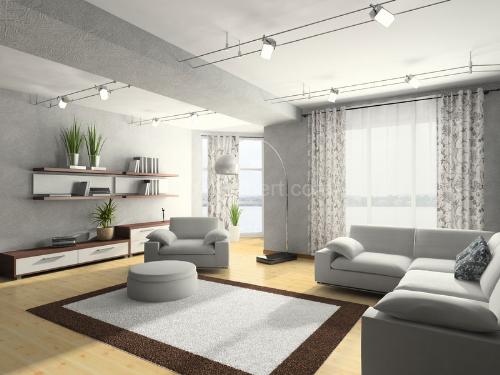 Using a monochromatic color scheme will help to make your space look bigger. Stick with the colors from the previous tip to maximize the illusion of a bigger space. Try to choose furniture colors that are similar in color to your walls. If you choose contrasting colors it will break up the space and make it seem smaller, so make sure you do not pick colors that are too different. You want to focus on creating a simple, calm looking effect.
 A simple ruler is helpful for many projects for cutting guides, measuring, and marking.


 Blue painter’s tape is essential to have for any painting project to mask off areas that you don’t want to paint. I find that it works best if you pull the blue tape off while your paint it still wet. If you wait until it is completely dry to pull it off, you may have problems with the paint you just painted on the wall peeling off with it. Blue tape can also be used to mark the locations of studs, or even to protect floors from dirt and scratches when you are moving.
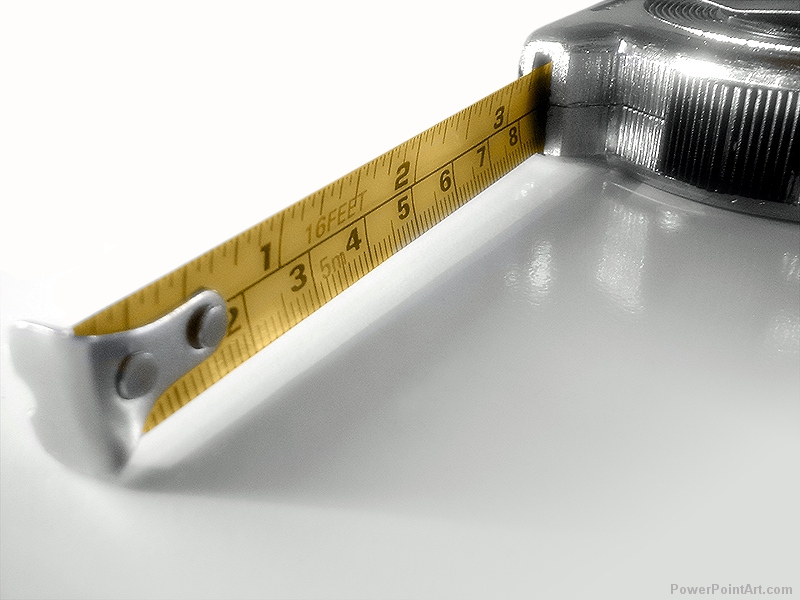 A flat head and Phillips head screw driver are very handy to have around for little fixes around the house. These can be used to tighten screws when kitchen cabinet hardware gets loose. It is also advisable to have a tiny set of screwdrivers to tighten eyeglasses or work on electronic equipment.


